Relays>>>Home Improvement
Brand Name WikX
Certification CE
Origin CN(Origin)
Size
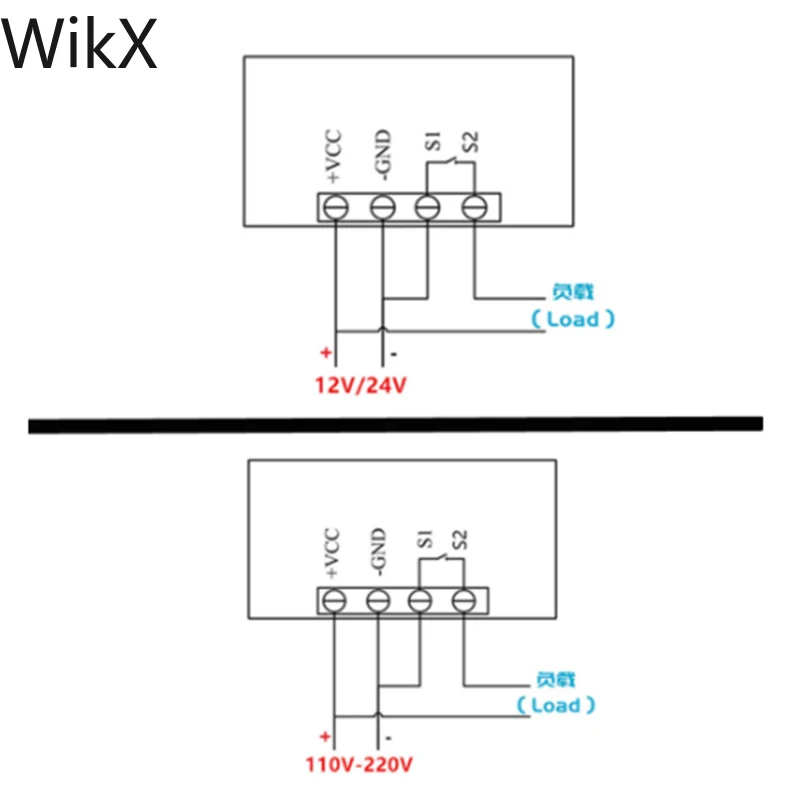
DC 12V
DV 24V
110V-220V

Technical Parameters:
Temperature control range: -50~120℃
Resolution: -9.9~99.9, 0.1℃, other temperature range 1℃
Temperature measurement accuracy: 0.1 ℃
Control accuracy: 0.1 ℃
Backlash accuracy: 0.1 ℃
Refresh rate: 0.5 S
Input power: DC 12V
Measurement input: NTC (10K 0.5%) waterproof sensor
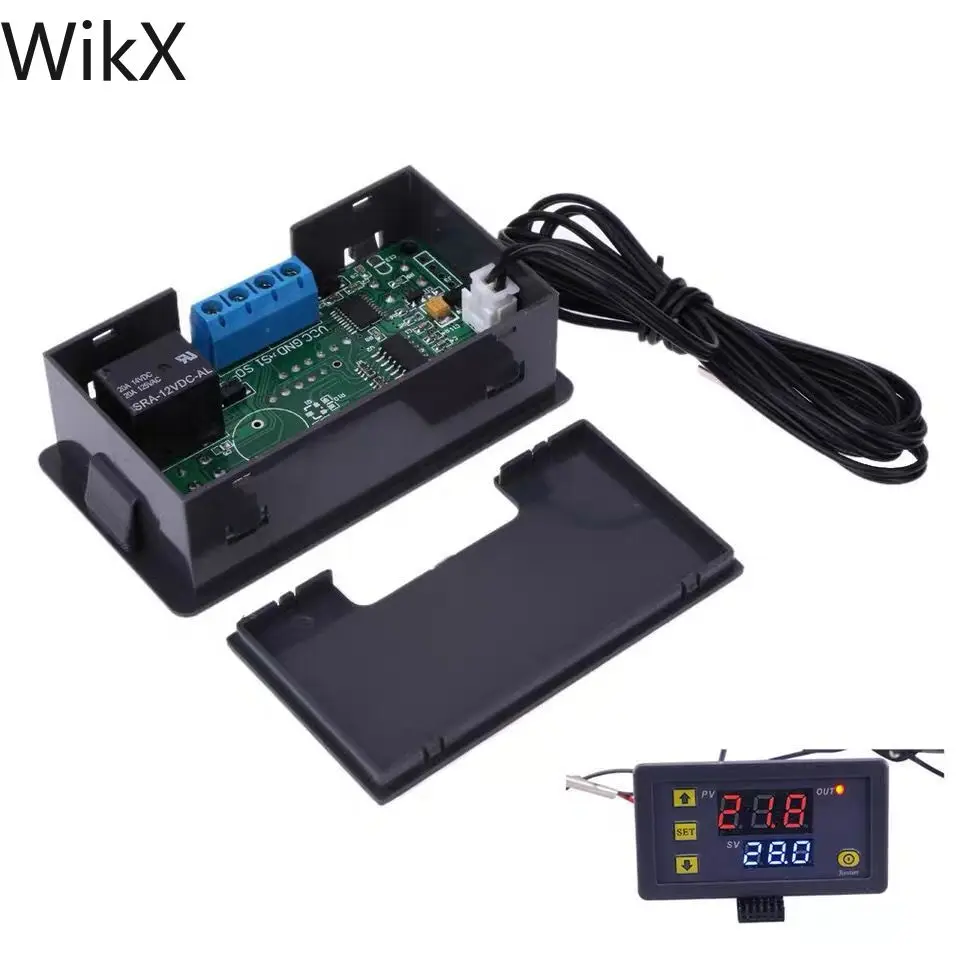
Output: 1 relay output, capacity=20A
Environmental requirements: -10~60℃, humidity 20%-85%
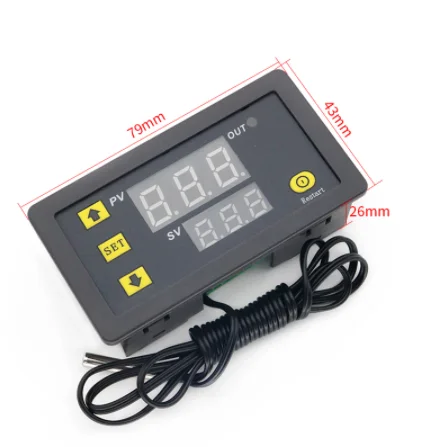
Specification size: 79mm*43mm*26mm
Instructions
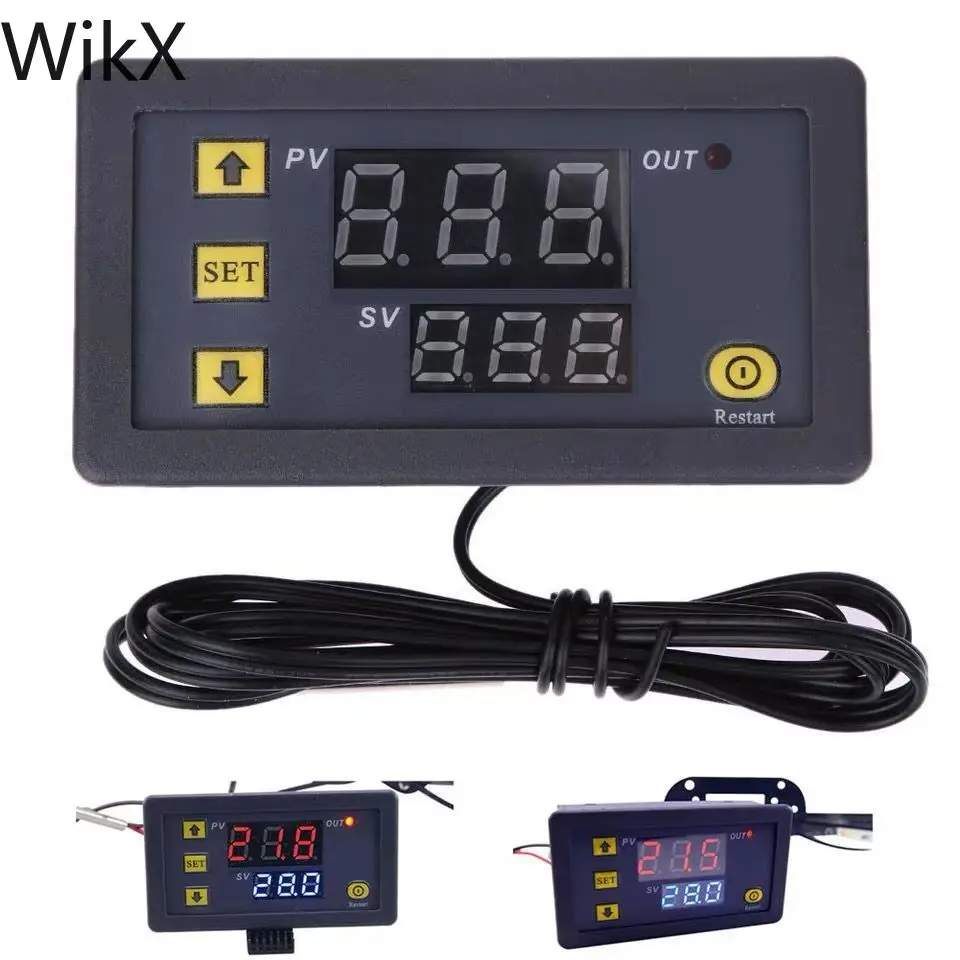
Connect the power supply and equipment to power the controller. At this time, the display shows the measured temperature. Press the SET button once, the temperature on the display flashes, and press +-to set the desired temperature (press +-to quickly rise and fall). After completion, press SET to confirm and return. At this time, the controller will automatically switch on and off the relay according to the setting! The thermostat output is a 20A relay, which meets various high-power loads. Connect the control circuit to power the thermostat. At this time, the display shows the ambient temperature.
Status description of indicator light, digital tube and buzzer
Indicator light: flashing means the cooling or heating start delay, constant light means the relay is closed
Digital tube: display LL as the sensor is open circuit, please connect the sensor according to the instructions; display HH as the measuring range is exceeded, the thermostat will forcibly disconnect the relay; display --- high temperature alarm
Parameter function description
(A manual is attached to the product, with detailed instructions for parameter settings)
Long press SET for 5 seconds to enter the main menu setting, press +-to switch P0...P6, long press SET or 10 seconds without key action, the controller automatically confirms and returns.
P0 cooling and heating mode
Long press SET for 5 seconds to display P0, press SET once to set the working mode, press +-to switch [H for heating mode] [C for cooling mode] Press SET once to return, long press SET or 10 seconds without key action, the controller automatically confirms carry out.
In refrigeration mode: when the temperature measurement value is greater than or equal to the temperature set point, the refrigeration relay is switched on and the refrigerator starts; when the temperature measurement value is less than or equal to the temperature set point-hysteresis, the refrigeration relay is disconnected and the refrigerator is turned off.
In heating mode: when the measured temperature value is less than or equal to the temperature set point, the heating relay is turned on and the heater starts; when the measured temperature value is greater than or equal to the temperature set point + hysteresis, the heating relay is turned off and the heater is turned off.
P1 Hysteresis setting
Long press SET for 5 seconds to display P0, press +-to switch to P1, press SET once to set the hysteresis value, press +- to set the hysteresis to 0.1-15, press SET once to return after completion, long press SET or no key for 10 seconds The motion controller automatically confirms completion.
In the cooling mode: when the temperature measurement value is greater than or equal to the set value, the relay is closed and the refrigerator starts; when the temperature measurement value is less than or equal to the set value-the return difference, the relay is disconnected and the refrigerator is turned off.
For example, when the environment is 30°C, the set value is 25°C, and the hysteresis is set to 2°C. After power-on, the relay is closed and the refrigerator starts. When the cooling reaches 23°C, the relay is disconnected and the refrigerator is closed. At this time, the refrigerator has been disconnected. The opening temperature begins to rise. When it returns to the set value of 25°C, the relay closes and the refrigerator starts again, so that the temperature is controlled to be no higher than 25°C by repeating the cycle.
In heating mode: when the temperature measurement value is less than or equal to the set value, the relay is turned on and the heater starts; when the temperature measurement value is greater than or equal to the set value + return difference value, the relay is turned off and the heater is turned off.
For example, when the environment is 10°C, the set value is 25°C, and the hysteresis is set to 2°C. After power on, the relay closes and the heater starts. When the heating reaches 27°C, the relay opens and the heater turns off. At this time, the heater has been turned off. The opening temperature begins to drop. When it drops to the set value of 25°C, the relay closes and the heater starts again, so that the temperature is not lower than 25°C through repeated cycles.
P2 temperature setting upper limit
In order to avoid the danger of excessively high set temperature caused by the misoperation of others, this thermostat has the function of setting the upper limit, which limits the setting range of the temperature set point controlled by the thermostat.
Long press SET for 5 seconds to display P0, press +-to switch to P2, press SET once to set the upper limit, press +-to set the settable temperature, the value is 110, press SET once to return after completion, long press SET or no for 10 seconds The key action controller automatically confirms the completion.
For example: set to 60. The temperature set point can only be set to 60℃. If you want a higher temperature set point to expand the temperature range, you need to adjust the upper limit set value first.
P3 temperature setting lower limit
In order to avoid other people's misoperation and cause ice blockage when the temperature is too low, this thermostat has the function of setting upper and lower limits, which limits the setting range of the temperature set point controlled by the thermostat.
Press SET for 5 seconds to display P0, press +-to switch to P3, press SET once to set the lower limit, press +- to set the settable temperature, the value is -50, press SET once to return after completion, long press SET or 10 seconds No key action controller automatically confirms completion.
For example: set to 2 The temperature set point can only be set to 2°C. If the temperature set point is lower and the temperature range is to be expanded, the lower limit set value needs to be adjusted first.
P4 temperature correction
When there is a deviation between the measured temperature and the standard temperature or due to the special needs of the user's hardware, you can use this function to calibrate. The temperature after calibration = the temperature before calibration + the calibration value. The effective range is -7.0~7.0.
Long press SET for 5 seconds to display P0, press +-to switch to P4, press SET once to calibrate, press +-to set the correction value, press SET once to return after completion, long press SET or no key action for 10 seconds, the controller automatically confirms completion .
For example, the normal display is 25 degrees; when the temperature is corrected to 0, it displays 25 degrees; when the temperature is corrected to 1.5, it displays 26.5 degrees; when the temperature is corrected to -1.5, it displays 23.5.
P5 Delay start time (unit: minutes)
When the refrigerator or heater needs to be delayed, the delay function can be turned on to protect the life of the equipment.
Long press SET for 5 seconds to display P0, press +-to switch to P5, press SET once to set the delay start time unit as minutes, press +-to set 0-10 minutes, press SET once to return after completion, long press SET or 10 seconds No button action controller automatically confirms completion
In cooling mode: when the current temperature is greater than or equal to the set value, the chiller will not start cooling immediately when the current temperature is greater than or equal to the set value. It needs to run after the set delay time to start.
In heating mode: the second power-on, if the current temperature is less than or equal to the set value, the heater will not start heating immediately, it needs to run after the set delay time to start.
When the stop time between two consecutive starts of the refrigerator or heater is greater than the set value of the delayed start time, the refrigerator starts immediately.
When the stop time interval between two consecutive starts of the refrigerator or heater is less than the set value of the delay start time, the device can be started after the set delay start time of the refrigerator has been run after restarting. The delay time is calculated from the moment of shutdown.
For example, in the cooling state, the delay is set to 5 minutes. After turning on the refrigerator, the refrigerator will start delay. After 5 minutes, the refrigerator will be turned on. When the required temperature is reached, the refrigerator will stop, and the timer will start at this time. Work, the unfinished timing can only work until the timing ends, and the LED indicator flashes during the delay.
When the delay start is set to 0, the delay function is turned off.
reset
Due to some man-made reasons, the internal settings of the thermostat are chaotic. It takes time to set one by one. At this time, you can use this function to restore the factory settings. The specific method is: in the shutdown state, press and hold the + and-buttons at the same time , And then turn on, all the above parameters are restored to the factory settings.


No comments:
Post a Comment